Match Height At Joint Line
The Real Cost of Getting Height Wrong
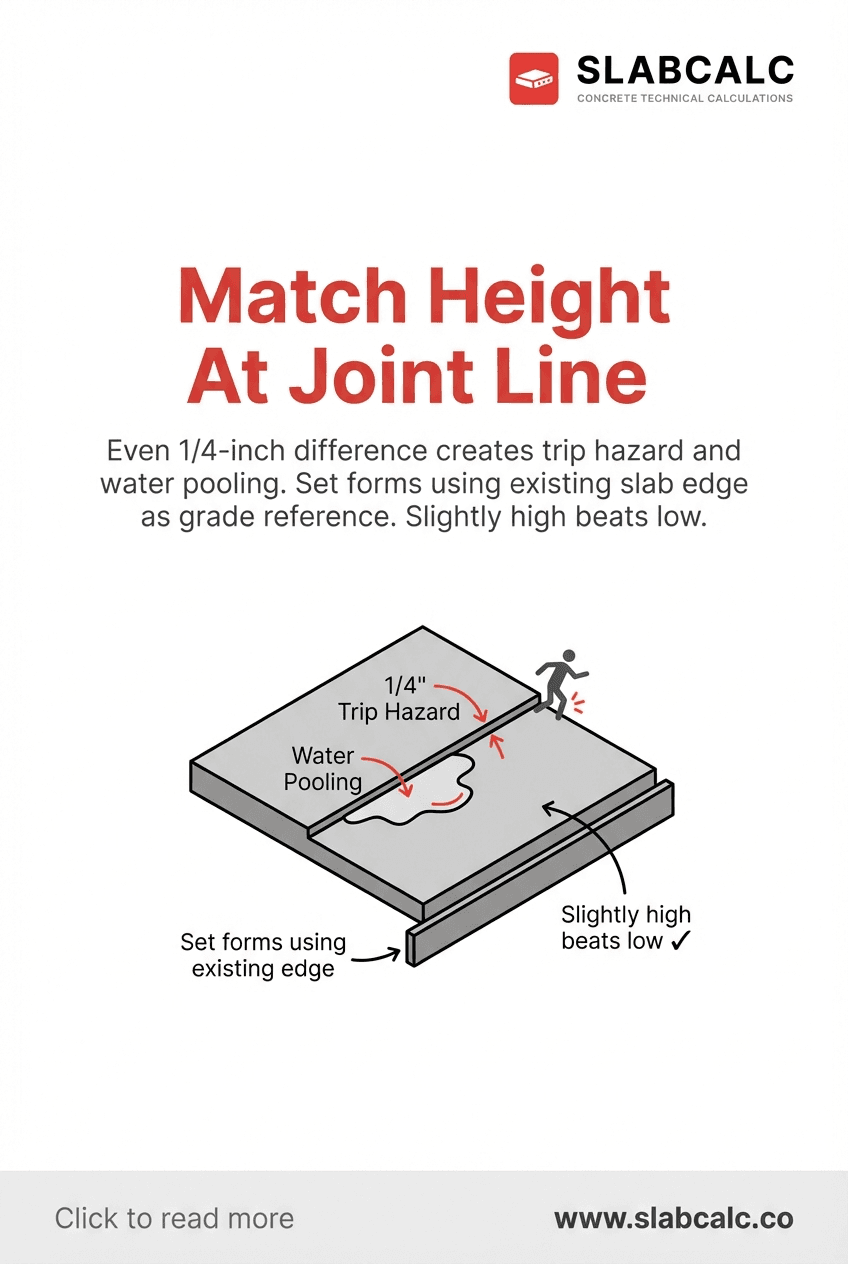
A 1/4-inch step at a concrete joint might seem minor, but it creates serious problems. Foot traffic stumbles on the lip—especially dangerous for elderly family members, children, and pets. Water pools in the low spot instead of running off, leading to accelerated deterioration, moss growth, and ice hazards in winter. Over time, that small step worsens as freeze-thaw cycles chip away at the joint edge. What started as a cosmetic issue becomes a structural and safety liability.
Why Height Mismatches Happen
The mistake usually stems from setting forms without referencing the existing slab. A DIYer measures "ground level" at multiple points, but yard grades vary slightly. Without using the existing concrete edge as the true reference, the new pour ends up 1/2 inch high or 3/8 inch low. Another common cause: forgetting that concrete shrinks 1/8 to 3/16 inch as it cures over 7 to 14 days. If you set forms to match the existing slab before pouring, your new slab may sink slightly below grade after curing.
How to Identify the Problem Early
Before you pour, check your setup with a straightedge at least three times along the joint line. Place a 4-foot or 6-foot straightedge across the existing slab edge and your freshly built forms. Any daylight gap means a height mismatch. Mark problem spots with chalk so you can adjust forms before concrete arrives.
The Correct Setup Checklist
Before building forms:
- Clean the existing slab edge completely—remove dirt, leaves, old caulk, and loose material
- Identify the existing slab's elevation at multiple points (every 2 feet if possible)
- Mark the highest point; use this as your grade reference
While building forms:
- Set one form board directly against the existing slab edge
- Use the existing slab top surface as your height guide—not the ground next to it
- Check level across the joint every 2 feet
- Slightly high beats slightly low: 1/16 inch above existing is acceptable and can be ground flush after curing; anything below creates pooling
Pro tip: Account for slight shrinkage by setting forms 1/8 inch high. After the concrete cures and hardens (7+ days), light grinding brings it perfectly flush.
After pouring:
- Check the joint line with a straightedge before the concrete fully sets
- If it's noticeably low, trowel fresh concrete into the low spot and re-level
- Seal the expansion joint with flexible polyurethane caulk once fully cured—this prevents water intrusion and protects against freeze-thaw damage
Getting height right takes 15 extra minutes during setup but saves years of trip hazards, water damage, and expensive repairs. Use your existing slab as the boss, not the ground around it.