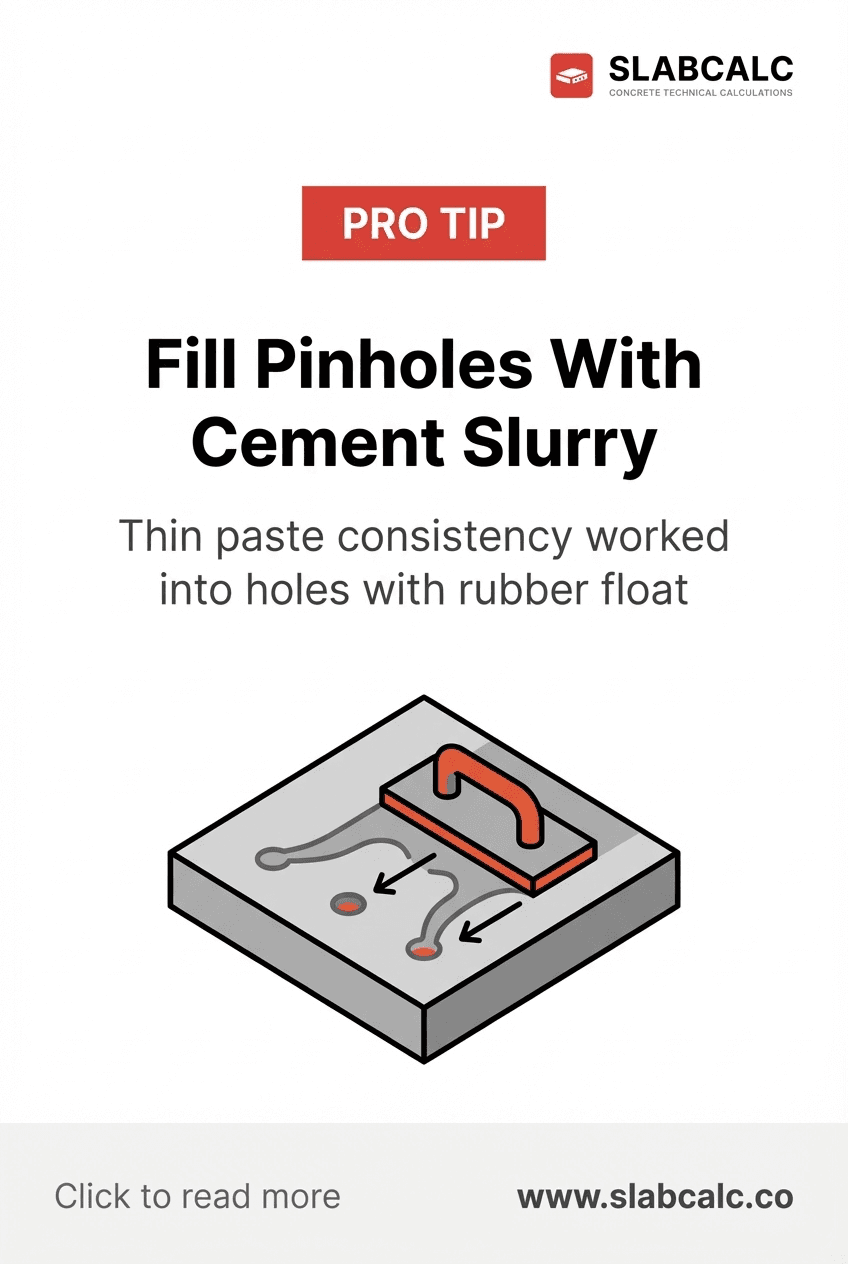
Fill Pinholes With Cement Slurry
The Mistake Most DIYers Make
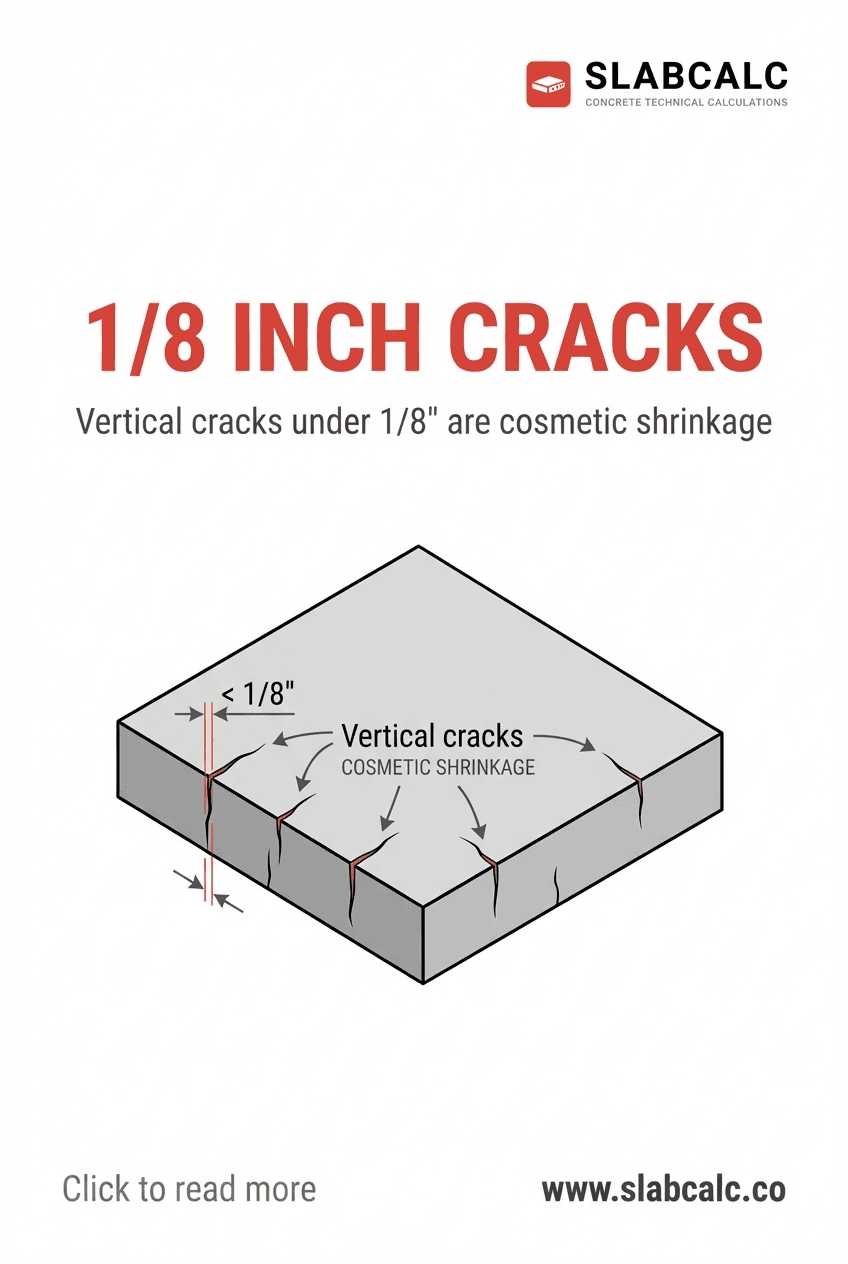
You've finished your concrete pour, and after a few days you notice scattered tiny holes across the surface—pinholes ranging from 1/32 to 1/8 inch. Your first instinct is probably to ignore them, thinking they're cosmetic. That's the mistake. Small voids trap moisture and look unprofessional on any exposed concrete. Most homeowners either leave them unfilled or try to grind the entire surface, wasting time and money.
Professional concrete finishers have a simple secret: a thin cement slurry and a rubber float, applied as a final detail-work step. It takes 15 minutes for an average patio and costs under $5 in materials.
Why Pinholes Form in the First Place
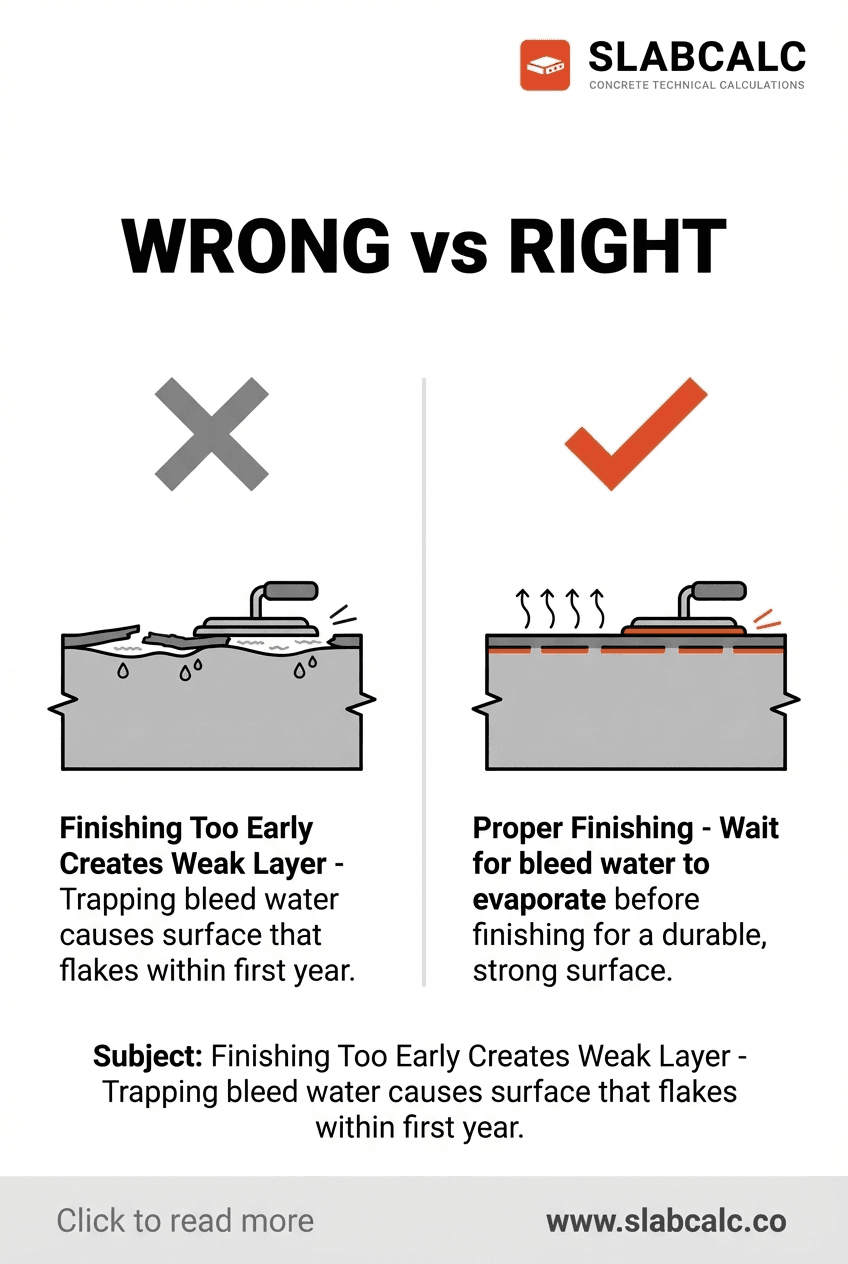
Pinholes happen because of finishing timing. Air and water get trapped at the surface during the power troweling stage. If you start floating before bleed water fully rises, or if you skip the bull float pass, those voids stay open. High-slump concrete (wetter mixes) brings more bubbles to the surface and makes the problem worse.
The good news: once the concrete has cured, filling them is straightforward.
The Cement Slurry Method: Step by Step
What you'll need:
- Portland cement (any standard gray or white variety)
- Clean water
- Rubber float or damp sponge
- Small mixing bucket
- Brush or cloth for cleanup
Step 1: Mix the slurry Combine Portland cement and water at a ratio of roughly 3 parts cement to 1 part water by volume. Mix until you achieve a thin, paint-like consistency—thinner than peanut butter, thicker than milk. The paste should flow easily but hold together when pressed.
Step 2: Work it into the holes Using your rubber float, press the slurry directly into each pinhole. Use firm, circular motions to force the paste into the void. The rubber face of the float is critical—it won't scratch the surrounding concrete like a trowel would. Work in small sections, about 3 feet by 3 feet at a time.
Step 3: Strike off excess After filling a section, drag the rubber float across the surface at a low angle to remove excess slurry. Wipe clean with a damp cloth or sponge. You're aiming for a flush finish, not a raised mound.
Step 4: Let it cure Allow the slurry to set for 24 hours before foot traffic. The Portland cement will cure and bond permanently to the existing concrete.
Pro Tips for Best Results
- Work on dry concrete. If the surface is wet, the slurry won't bond properly.
- Use white Portland cement if your concrete is light-colored, for a better color match.
- Don't oversaturate. More water weakens the bond; stick to the thin paste consistency.
- Apply within days of noticing pinholes, not months later when dirt has settled into them.
This method works for scattered pinholes across up to 500 square feet. For dense pinhole coverage across large areas, consider a polymer-modified skim coat instead—products like Ardex K-301 run $1–2 per square foot.