Undercut Edge Slightly for Patch
The Mistake Everyone Makes
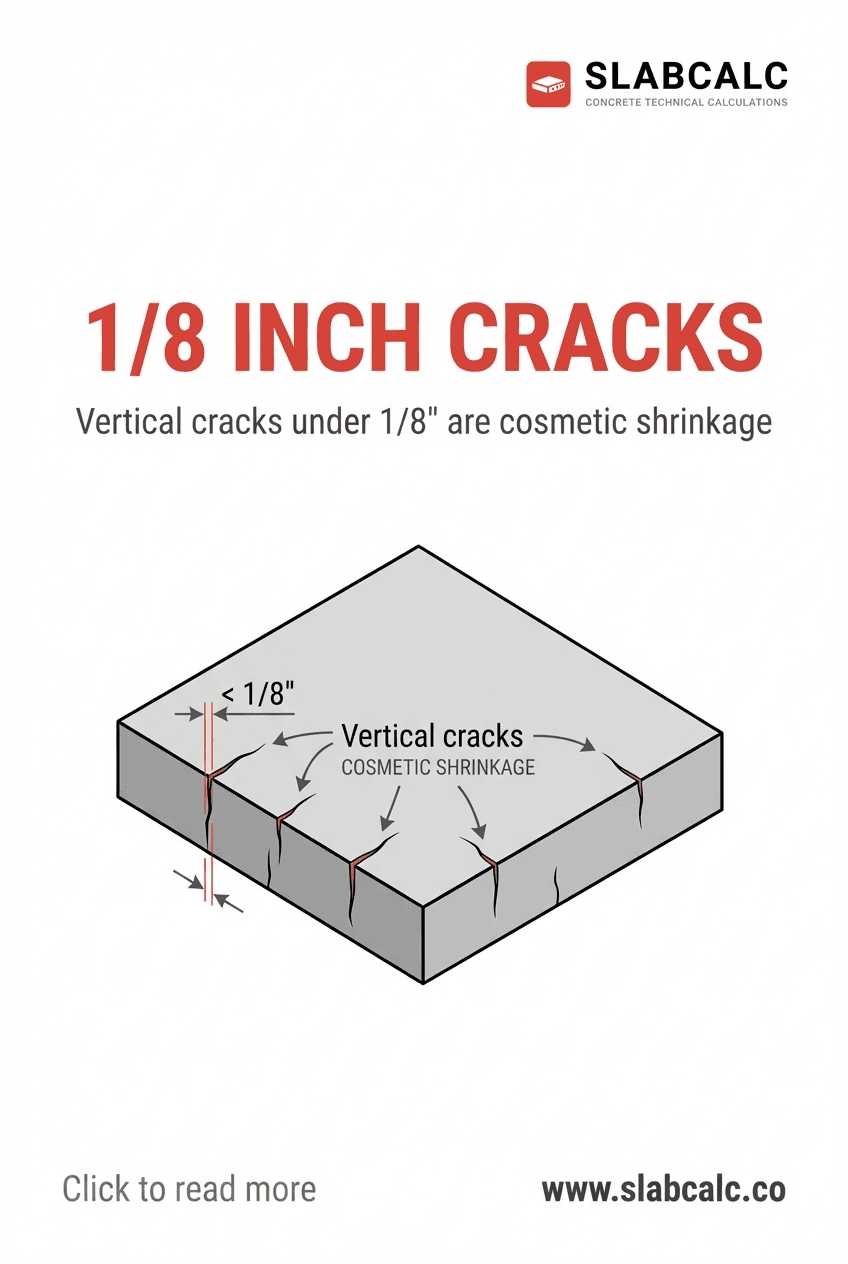
You chip away the crumbled concrete, slap on polymer-modified mortar, smooth it flush with the old edge, and call it done. Six months later—or sometimes sooner—the patch separates and crumbles just like the original damage. The mortar literally peels away from the concrete surface.
This happens because you're relying on adhesion alone. Mortar bonds chemically to concrete, but concrete edges are weak. Your patch is only as strong as the surface it's stuck to, and if that surface is deteriorating, the bond fails.
The Professional Solution: Create a Ledge
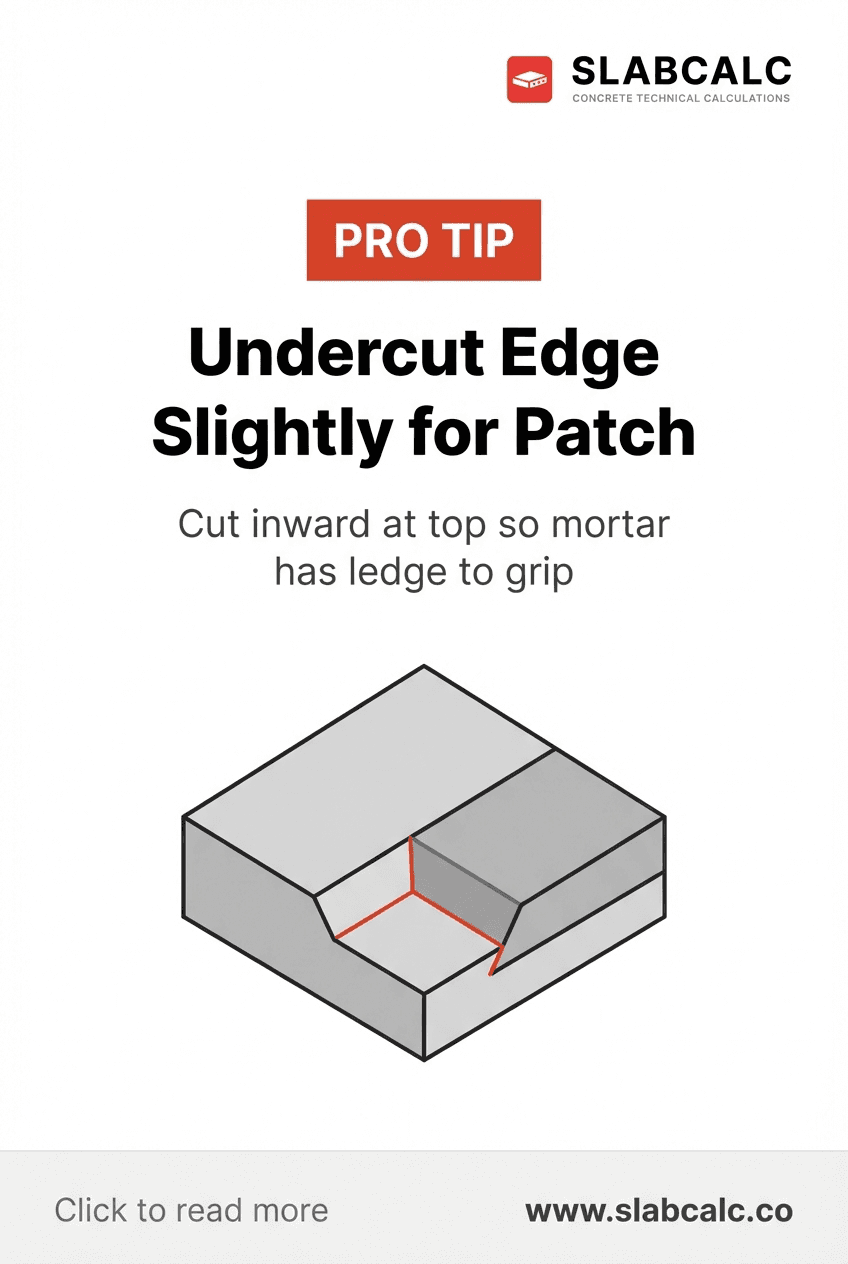
Pros undercut the edge inward at a slight angle—typically 10 to 15 degrees—creating a mechanical lock rather than just surface adhesion. The mortar fills this beveled groove and physically grips the edge like a keystone in an arch. When the patch shrinks or weathers, it can't pull straight away because the ledge holds it back.
This technique costs nothing extra and takes only 2 extra minutes per edge. It's the difference between a patch that lasts 5 years and one that lasts 15+.
Why the Mechanical Bond Works
Concrete patches fail for three reasons: adhesive failure (mortar pulls off), cohesive failure (mortar breaks internally), or substrate failure (the old concrete breaks). Undercutting addresses adhesive failure directly. By creating a ledge, you convert a butt joint into an interlocking joint. The mortar can't slip out horizontally because the geometry prevents it.
Polymer-modified mortar shrinks 8–10% as it cures. A flush patch experiences maximum stress at the edge during this shrinkage phase. An undercut edge distributes that stress over a larger area and locks the patch in place mechanically.
Step-by-Step Application
1. Prepare the edge. Use a cold chisel or concrete grinder with a diamond blade to cut inward at the top of the damaged area. Angle the cut 10–15 degrees inward (about 1/16-inch of depth per inch of width).
2. Create clean edges. Make sure the undercut is smooth and uniform. Jagged cuts create stress concentration points.
3. Clean thoroughly. Blow out dust with compressed air and dampen the concrete with water. Let it become surface-dry (damp but not shiny) so the mortar bonds properly.
4. Fill the patch. Apply polymer-modified concrete patching mortar (Quikrete Vinyl Concrete Patcher or Sakrete Top 'N Bond work well). Pack it firmly into the undercut ledge.
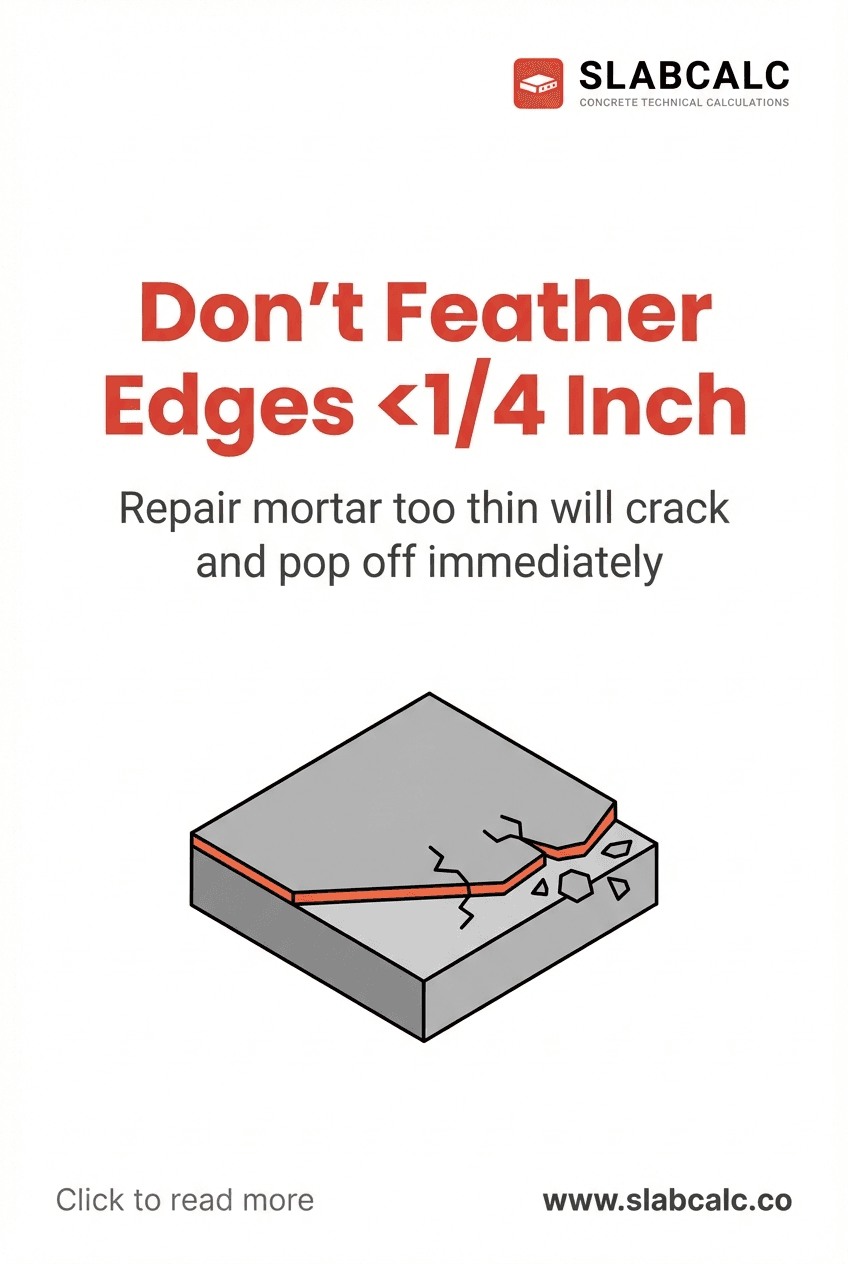
5. Feather and cure. Feather the top edge smooth, but keep it slightly proud (raised 1/8-inch above the edge). It will shrink flush. Cover the patch for 24 hours to slow curing and reduce shrinkage stress.
The Numbers
A properly undercut patch on a 1-foot step edge takes 10 extra minutes and uses the same materials you already budgeted. That's $0 in additional cost for a 3× improvement in longevity. Most DIY step edge patches cost $50–150 in material. Undercutting doesn't increase your budget—it increases your return on investment dramatically.