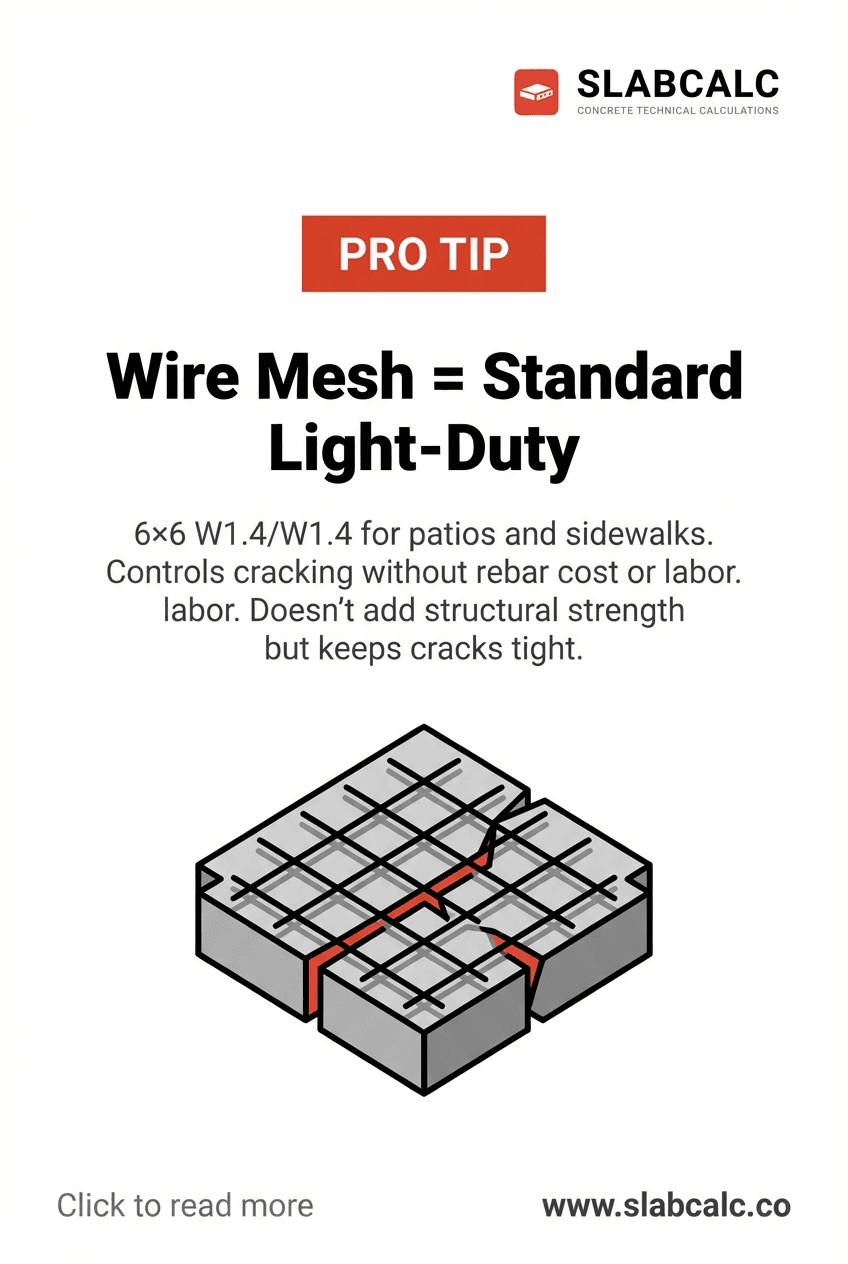
Wire Mesh = Standard Light-Duty
The Mistake Most DIYers Make
You've decided to pour a patio or sidewalk, and you're thinking: Do I really need reinforcement? It's just concrete. Then a hairline crack appears six months later, runs across your new slab, and suddenly you're wondering if you cheaped out on materials. The truth is more nuanced—and cheaper—than you think.
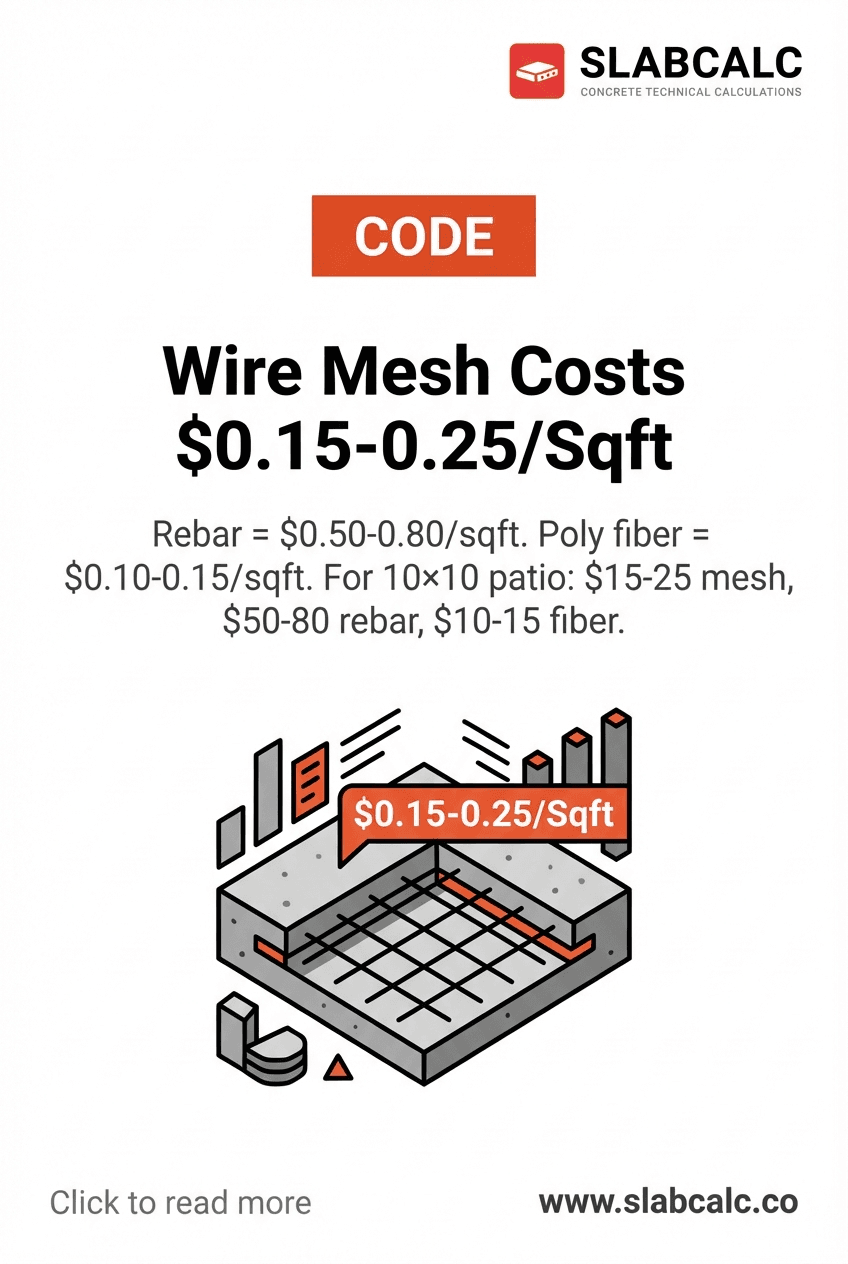
Most homeowners either skip reinforcement entirely (inviting cracks) or overkill with rebar (paying $0.50–0.80 per square foot when they don't need structural strength). There's a professional sweet spot between these extremes: 6×6 W1.4/W1.4 wire mesh, which costs just $0.15–0.25 per square foot and keeps cracks tight without the labor or expense of rebar placement.
Why Wire Mesh Works for Light-Duty Slabs
Wire mesh doesn't add structural strength—that's critical to understand. A patio or sidewalk doesn't need rebar because people walking or standing on it don't create the same stresses as a vehicle driving over a driveway. What these slabs do need is crack control.
Concrete shrinks as it cures, especially in the first 28 days. Without reinforcement, this shrinkage stress concentrates at weak points, and you get one or two wide cracks. With wire mesh distributed throughout the slab, shrinkage stress is spread across hundreds of tiny holding points. Instead of one ¼-inch crack, you get dozens of hairline cracks—practically invisible and structurally harmless.
The 6×6 W1.4 specification means:
- 6×6 grid: Wires spaced 6 inches apart in both directions
- W1.4 gauge: Wire diameter of approximately 0.135 inches
This size is the industry standard for patios, sidewalks, and light-duty flatwork. It's strong enough to prevent noticeable cracking but light enough to handle easily without chairs or lifting equipment.
How to Install Mesh Like a Pro
Step 1: Prepare your base. Compact soil 4–6 inches deep. Pour 4 inches of gravel and compact it thoroughly. This prevents settling that causes differential cracking.
Step 2: Lay the mesh mid-slab. This is crucial: mesh only works if it's near the middle of your concrete thickness, not at the top or bottom. For a 4-inch slab, position mesh 2 inches down.
Step 3: Use concrete blocks or rebar chairs. Place 2-inch concrete blocks under the mesh grid (spaced every 3 feet) to keep it suspended at mid-depth during the pour.
Step 4: Overlap joints. Where mesh sheets meet, overlap by one full grid square (6 inches) to maintain continuity. Secure with wire ties if windy.
Step 5: Pour and finish normally. Concrete flows around mesh easily. No special finishing technique needed.
Cost Reality Check
For a 200 square-foot patio:
- Wire mesh: 200 sq ft × $0.20 = $40
- Rebar equivalent: 200 sq ft × $0.65 = $130 (plus installation labor)
You're saving $90 in materials alone, plus 2–3 hours of rebar layout labor. The mesh pays for itself immediately while delivering professional-grade crack control.
Use our concrete calculator to confirm your project scope, then order 6×6 W1.4 mesh—the pro standard for patios and sidewalks.